Start by carefully unboxing all the parts of the Kinderfeets Tiny Tot Trike. Lay all pieces on a clean, flat surface to ensure nothing is missing. Typically, you’ll find the main frame, the front wheel, the rear wheels, the handlebar, and a small bag containing bolts, washers, and an Allen key.
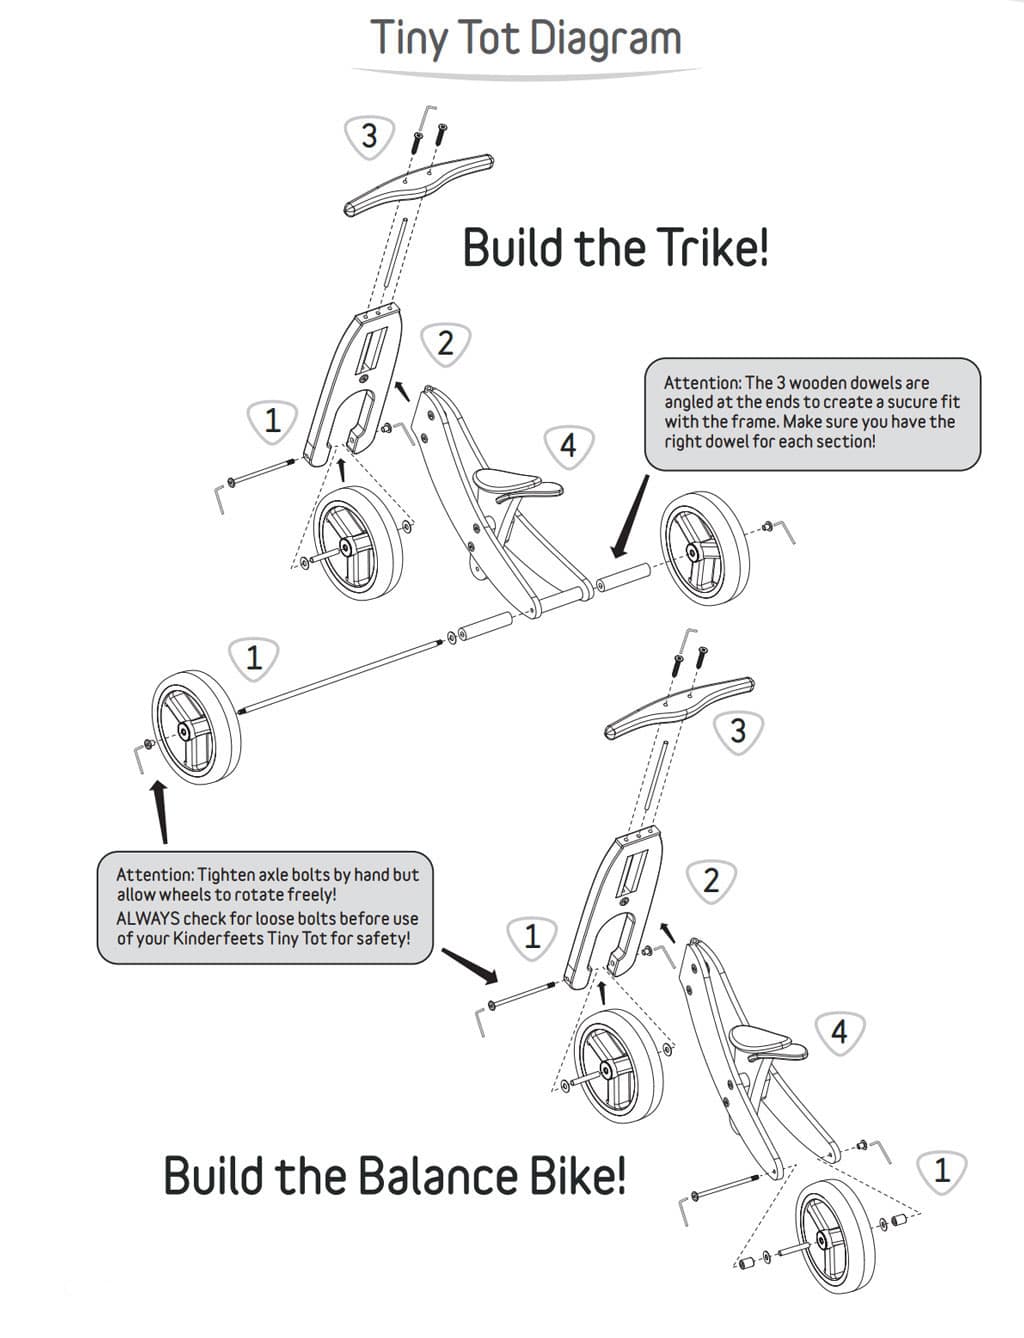
Step 1: Install the Wheels
Slide the front wheel into position as shown and push the axle through the opening. Make sure the spacers are on the outside of the wheels and inside the fork. Tighten with bolts so the wheels turn freely, but bolts are tight.
Slide the long metal axle through the rear wheels, washer, and wooden dowels per the image. Tighten the bolts so the wheels turn freely, but make sure the bolts are tight. Always check the bolts before use.
Step 2: Frame
Insert the frame into the fork’s opening, ensuring the Kinderfeets logo faces forward.
Step 3: Handlebar
Slide the metal pin into the middle opening on top of the fork and through the frame. Insert screws and tighten.
Step 4: Attach the Seat
The seat is set at its lowest position. To adjust the seat, loosen the 2 screws and take them out. Adjust the seat to the required position and re-tighten the screws.
Step 5: Final Adjustments
After assembling all the parts:
Give your trike a thorough check.
Ensure all bolts and screws are tightened properly to avoid any accidents.
Adjust the seat to the height that best suits your child for a comfortable riding position.
How to Convert Kinderfeet Trike to Bike
You will need the two-wheel conversion axle to change a Kindefeets trike to a balance bike.
Remove the rear wheel assembly.
Using the Kinderfeets balance bike conversion kit, assemble the single wheel as shown in the diagram.
Ensure all parts are secure and there are no sharp edges or points where little fingers could get caught.
Check that the wheels spin freely and the trike stands stable on the ground.
Enjoy the Ride
Now that the Kinderfeets Tiny Tot Trike is assembled, it’s time for the fun part. Introduce your child to their new trike, ensuring they understand the basics of riding safely. Always supervise them, especially during their initial rides.
Assembling a Kinderfeets Tiny Tot Trike is not just about putting together a toy; it’s about creating memories and learning experiences for your child. Enjoy the process, and happy riding!